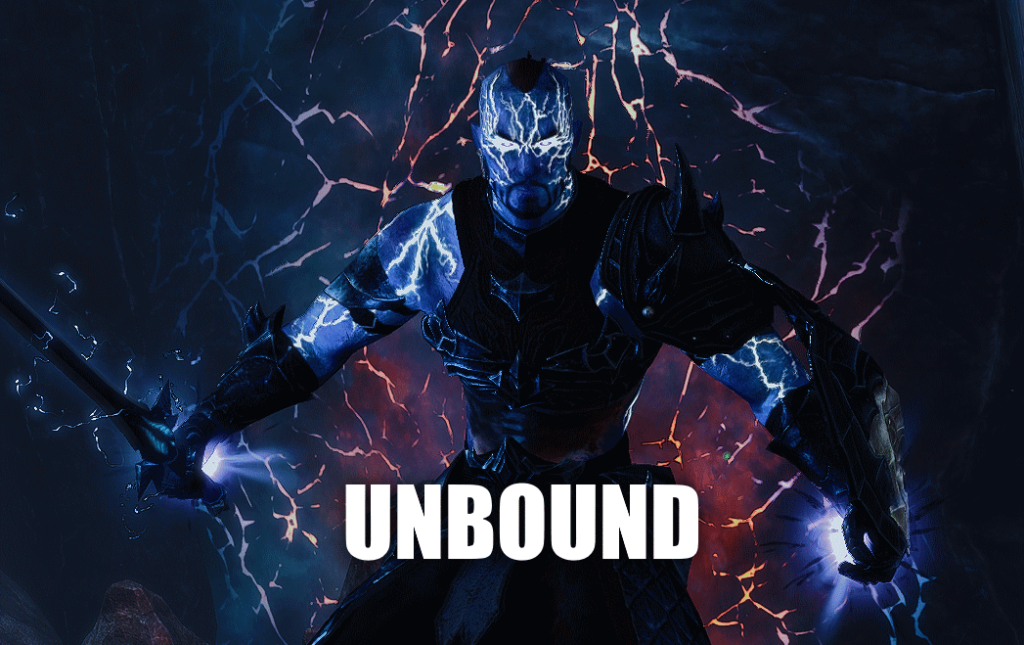
SORCERER TANK BUILD
Writer: @xGAMxHQ
Role: PVE Tank
Patch: Update 41 – Scions of Ithelia
TABLE OF CONTENTS
The Unbound Sorcerer Tank Build for ESO (The Elder Scrolls Online) is optimized for all players looking for the best build guide around for Trials, Dungeons, and Arenas, whether you’re a beginner, a long-time veteran, or just returning to the game.
The Tank role in ESO is responsible for maintaining taunts on the most threatening enemies and keeping them locked down using Crowd-Control (CC) abilities that stun, immobilize, or fear. Once you become more comfortable in the role, you will be able to reliably self-sustain resources, self-heal, buff group members, and debuff enemies using your various armor sets, skills, and Ultimate abilities.
The Sorcerer Tank has low-costing Ultimate and core combat abilities, a strong damage shield, incredible self-healing, self-sustain, and damage mitigation; however, they are not always the most beginner-friendly option. Your strongest self-heal must be double-slotted to remain active, meaning you have less flexibility with alternative skills. Your other self-healing ability that also restores Stamina has a cast time, causing you to stop blocking while casting it. Sorcerers have three skill lines:
The Daedric Summoning skill line focuses on a blend of offensive, defensive, and healing abilities. Bound Aegis is now one of your strongest abilities thanks to the most recent update. It now passively increases your Maximum Magicka by 9% and grants the Minor Protection and Minor Resolve buffs while slotted on either ability bar, meaning you will benefit from these buffs at all times. Additionally, the Power Stone passive reduces the cost of all Ultimate abilities by 15%.
The Dark Magic skill line focuses on offensive and healing abilities. Dark Deal provides a burst of Health and Stamina immediately upon casting and continues to restore Stamina over time. Additionally, casting Dark Deal grants Minor Prophecy to the entire group due to the Exploitation passive. Granting Minor Prophecy group-wide is unique to the Sorcerer class.
The Storm Calling skill line focuses on offensive abilities; however, it provides the build one critical defensive ability called Boundless Storm. This skill is your source of Major Resolve, but it also grants you Major Expedition for a short duration after casting it, allowing you to be more mobile during fights. The Storm Calling skill line also increases your Magicka Recovery by 10% due to the Capacitor passive.
The Sorcerer Tank build covers everything you need to know, including recommended armor setups, skills, champion points, and many alternatives to meet various needs. Please read the entire build and bookmark the page, as it will update with each new patch.
MARCH 19 / 2024: – UPDATE 41 – SCIONS OF ITHELIA
• Adjusted Attribute Points.
• All Armor Setups (Except Beginner):
• Changed the trait of the Head, Chest, and Legs pieces from Sturdy to Reinforced to increase Armor Rating.
• Adjusted Skills:
• Removed Unstable Clannfear from both bars.
• Moved Unstable Clannfear to the Alternative Skills section.
• Moved Bound Aegis to the back bar.
• Added Heroic Slash to the front bar.
• Added Vibrant Shroud to the front bar.
• Replaced Regenerative Ward with Hardened Ward.
• Moved Regenerative Ward to the Alternative Skills section.
• Replaced Destructive Clench with Inner Rage.
• Moved Destructive Clench to the Alternative Skills section.
• Adjusted Champion Points:
• Better optimized progression path to unlock the most vital perks and passives first.
• Warfare:
• Replaced Enduring Resolve with Focused Mending.
• Fitness:
• Replaced Boundless Vitality with Shield Master.
• Added Bastion to alternative perks.
RACE
NORD


REDGUARD


IMPERIAL


The races that offer the best passives for Tanks are Nord, Redguard, Imperial, and Argonian, though all races are capable of Tanking. The Sorcerer Tank build utilizes the Nord racial passives, as they offer a unique passive that helps you regenerate Ultimate faster. Choose a race that best suits your needs.
Nords offer a unique passive that allows them to regenerate Ultimate faster than any other race while taking damage, which slightly edges out Ultimate cost reduction. They also increase your Maximum Health by 1,000, Maximum Stamina by 1,500, Physical and Spell Resistance by 2,600, and your Frost Resistance by 4620.
Redguards offer the best Stamina sustain, reducing the cost of your weapon abilities by 8% and allowing you to restore 1,005 Stamina every 5 seconds for dealing damage, even while blocking. This comes to 12,060 Stamina per minute, which is incredibly helpful if you are having difficulty sustaining your Stamina. They also increase your Maximum Stamina by 2,000 and reduce the effectiveness of snares applied to them by 15%.
Imperials are a well-rounded option that offers excellent overall sustain, including a 6% cost reduction to all skills and abilities, including block, roll dodge, and even your Ultimate abilities. They also increase your Maximum Health and Maximum Stamina by 2,000.
ATTRIBUTE POINTS
MAGICKA
20
HEALTH
23
STAMINA
21
Tanks typically aim to have at least 36,850 Maximum Health before the Minor Toughness buff and a Maximum Stamina value that exceeds your Maximum Magicka value. Doing this ensures that you always restore Stamina when you activate the Luminous Shards or Energy Orb synergy provided by your Healers.
The Sorcerer Tank build reaches:
• 40K+ Maximum Health
• 30K+ Maximum Stamina
• 26K+ Maximum Magicka
The above distribution of Attribute Points had the following buffs, passives, etc., active:
• Nord Race
• Bewitched Sugar Skulls
• Main Tank Setup (Legendary Quality)
• The Minor Toughness Buff
• All Class Passives
• All Champion Point Passives
You may need to adjust your Attribute Points if you use a different race, food, enchantments, quality, etc. Find a balance that best suits your needs.
TRIAL SETUPS
The Sorcerer Tank build uses some of the Best Tank Sets in ESO to bolster your defences and increase group Ultimate regeneration, debuff uptimes, damage, and survivability. The Perfected versions of the Trial sets give additional stat boosts for wearing all five pieces, but they do not make or break the build.
These Armor Setups use the Harmony jewelry trait and the Sturdy armor trait. Harmony maximizes sustain as long as your group provides enough synergies, and the Sturdy armor trait improves your Stamina sustain by allowing you to block for longer.
If Stamina sustain isn’t an issue, you could swap out a few traits on your armour pieces for Divines, increasing your Mundus Stone’s effectiveness. In this case, you would gain more Magicka Recovery from the Atronach Mundus Stone.
MAIN TANK SETUP
| SET NAME | TRAIT | ENCHANTMENT | WEIGHT/TYPE | ACQUIRED | |
|---|---|---|---|---|---|
|
HEAD |
Sturdy |
Prismatic Defense |
Medium |
Veteran Shipwright's Regret |
|
|
SHOULDERS |
Sturdy |
Prismatic Defense |
Light |
Undaunted Enclave |
|
|
CHEST |
Reinforced |
Prismatic Defense |
Heavy |
Black Drake Villa |
|
|
HANDS |
Sturdy |
Prismatic Defense |
Heavy |
Black Drake Villa |
|
|
WAIST |
Sturdy |
Prismatic Defense |
Heavy |
Black Drake Villa |
|
|
LEGS |
Reinforced |
Prismatic Defense |
Heavy |
Black Drake Villa |
|
|
FEET |
Sturdy |
Prismatic Defense |
Heavy |
Black Drake Villa |
|
|
NECKLACE |
Harmony |
Magicka Recovery |
Jewelry |
Shipwright's Regret |
|
|
RING |
Harmony |
Magicka Recovery |
Jewelry |
Shipwright's Regret |
|
|
RING |
Harmony |
Magicka Recovery |
Jewelry |
Shipwright's Regret |
|
|
FRONT BAR (MAIN HAND) |
Decisive |
Absorb Stamina |
One-handed |
(Veteran) Dragonstar Arena |
|
|
FRONT BAR (OFF-HAND) |
Reinforced |
Maximum Health |
Shield |
(Veteran) Dragonstar Arena |
|
|
BACK BAR |
Infused |
Crusher |
Ice Staff |
Shipwright's Regret |
Nazaray is used during boss fights to significantly increase the duration of debuffs on enemies when you use an Ultimate ability. For the best results, use your Ultimate immediately after applying Major Vulnerability with Turning Tide.
If you’re not in a boss fight or don’t intend to cast your Ultimate ability, you could instead equip the Mythic shoulder piece Spaulder of Ruin. Pairing it with one piece of the Magma Incarnate or Baron Thirsk monster set will increase your Magicka and Stamina Recovery to help offset a small portion of the negative effects given by Spaulder of Ruin. Chokethorn is a non-DLC, non-PVP alternative to Magma Incarnate and Baron Thirsk that increases your Magicka Recovery but doesn’t give you additional Stamina Recovery.
Drake’s Rush grants Major Heroism to you and 3 other group members when you bash an enemy, generating 3 Ultimate every 1.5 seconds. This allows everyone in the group to build Ultimate incredibly quickly. Because it generates the Ultimate over time rather than all at once, it gives you much more control over your Ultimate usage than Arkasis’s Genius and benefits from the Decisive weapon trait.
If you don’t have an Arcanist in your group, swap to (Perfected) Claw of Yolnahkriin to provide Minor Courage to your group members. It allows you to grant Minor Courage to all group members by taunting an enemy, increasing Weapon and Spell Damage by 215. This set also passively grants you Minor Aegis at all times, reducing your damage taken from Dungeon, Trial, and Arena Monsters by 5%.
During add fights, equipping Crimson Oath’s Rive allows you to reduce the Physical and Spell Resistance of all enemies around you by 3,541.
Turning Tide allows you to easily apply Major Vulnerability to multiple enemies in front of you as any class, increasing their damage from all sources by 10%.
(Perfected) Puncturing Remedy significantly increases your survivability by providing a solid heal and Physical and Spell Resistance equal to the heal every 5 seconds when you taunt an enemy with Pierce Armor.
OFF-TANK SETUP
| SET NAME | TRAIT | ENCHANTMENT | WEIGHT/TYPE | ACQUIRED | |
|---|---|---|---|---|---|
|
HEAD |
Sturdy |
Prismatic Defense |
Medium |
Veteran Black Drake Villa |
|
|
SHOULDERS |
Sturdy |
Prismatic Defense |
Light |
Undaunted Enclave |
|
|
CHEST |
Reinforced |
Prismatic Defense |
Heavy |
(Veteran) Dreadsail Reef |
|
|
HANDS |
Sturdy |
Prismatic Defense |
Heavy |
(Veteran) Dreadsail Reef |
|
|
WAIST |
Sturdy |
Prismatic Defense |
Heavy |
(Veteran) Dreadsail Reef |
|
|
LEGS |
Reinforced |
Prismatic Defense |
Heavy |
(Veteran) Dreadsail Reef |
|
|
FEET |
Sturdy |
Prismatic Defense |
Heavy |
(Veteran) Dreadsail Reef |
|
|
NECKLACE |
Harmony |
Magicka Recovery |
Jewelry |
(Veteran) Rockgrove |
|
|
RING |
Harmony |
Magicka Recovery |
Jewelry |
(Veteran) Rockgrove |
|
|
RING |
Harmony |
Magicka Recovery |
Jewelry |
(Veteran) Rockgrove |
|
|
FRONT BAR (MAIN HAND) |
Decisive |
Absorb Stamina |
One-handed |
(Veteran) Dragonstar Arena |
|
|
FRONT BAR (OFF-HAND) |
Reinforced |
Maximum Stamina |
Shield |
(Veteran) Dragonstar Arena |
|
|
BACK BAR |
Infused |
Crusher |
Ice Staff |
(Veteran) Rockgrove |
Encratis’s Behemoth creates an aura that benefits your group members and debuffs your enemies:
• Group members inside the aura take 5% reduced Flame Damage.
• Enemies inside the aura take 5% increased Flame Damage.
A Flame Damage ability is required to trigger the aura, such as Scalding Rune.
If you don’t have many enemies or group members dealing Flame Damage, equipping Engine Guardian significantly improves your self-sustain. Despite restoring a random resource, it provides the best self-sustain for a Tank because it restores resources instead of increasing your recovery stat. Restored resources bypass the Stamina Recovery lock that occurs when you block or sprint, allowing you to gain Stamina while doing either.
Pearlescent Ward increases the group’s Weapon and Spell Damage by up to 180 or damage reduction from non-player enemies by up to 66%, depending on how many group members are dead. It helps your group recover from nearly wiping and even works if you’re dead or occupied with a group separation mechanic. This set also passively grants you Minor Aegis at all times, reducing your damage taken from Dungeon, Trial, and Arena Monsters by 5%.
Saxhleel Champion grants Major Force when you cast any Ultimate ability. It’s primarily used to further increase the uptime of Major Force when using Aggressive Horn; however, The Sorcerer Tank build uses Charged Storm Atronach to also grant Major Berserk to the entire group. Using the Armor Setup above means you must cast the Ultimate slotted on your back bar. This is ideal for an offensive playstyle, but if you play more defensively or need to use Replenishing Barrier more often, equip Saxhleel Champion on the front bar as well.
If your group already has great Major Force uptime, (Perfected) Pillager’s Profit is an excellent alternative that allows you to increase the group’s Ultimate regeneration when you cast your Ultimate. Because this set caps the amount of Ultimate you can share at 20 per tick, it’s best to cast your Ultimate ability no later than a maximum of 400 Ultimate.
A non-DLC alternative to Saxhleel Champion is Powerful Assault, though some groups may have their Healers wear this set. It increases the group’s Weapon and Spell Damage by 307, improving overall group damage and healing. Powerful Assault requires you to cast an ability from the Assault skill line to trigger it, and it needs to be cast twice to benefit the entire group while in a Trial. Tanks commonly use Echoing Vigor because it’s a strong HOT with a large radius and low cost.
(Perfected) Puncturing Remedy significantly increases your survivability by providing a solid heal and Physical and Spell Resistance equal to the heal every 5 seconds when you taunt an enemy with Pierce Armor.
INTERMEDIATE SETUP
The Intermediate Setup for the Sorcerer Tank build is optimized for Tanks that may not be ready for Trial content but want to replace Crafted Sets. Many Dungeon and Overland sets are easy to collect while effective in early to mid-game content.
The selection of sets below will help to reduce enemy Physical and Spell Resistance, increase your group’s Ultimate regeneration, and reduce the cost of your Ultimate abilities.
| SET NAME | TRAIT | ENCHANTMENT | WEIGHT/TYPE | ACQUIRED | |
|---|---|---|---|---|---|
|
HEAD |
Sturdy |
Maximum Health |
Medium |
Veteran Volenfell |
|
|
SHOULDERS |
Sturdy |
Maximum Magicka |
Light |
Undaunted Enclave |
|
|
CHEST |
Reinforced |
Maximum Health |
Heavy |
Black Drake Villa |
|
|
HANDS |
Sturdy |
Maximum Magicka |
Heavy |
Black Drake Villa |
|
|
WAIST |
Sturdy |
Maximum Magicka |
Heavy |
Black Drake Villa |
|
|
LEGS |
Reinforced |
Maximum Health |
Heavy |
Black Drake Villa |
|
|
FEET |
Sturdy |
Maximum Magicka |
Heavy |
Black Drake Villa |
|
|
NECKLACE |
Healthy |
Magicka Recovery |
Jewelry |
Eastmarch Overland |
|
|
RING |
Healthy |
Magicka Recovery |
Jewelry |
Eastmarch Overland |
|
|
RING |
Healthy |
Magicka Recovery |
Jewelry |
Eastmarch Overland |
|
|
FRONT BAR (MAIN HAND) |
Decisive |
Absorb Stamina |
One-handed |
Eastmarch Overland |
|
|
FRONT BAR (OFF-HAND) |
Reinforced |
Maximum Health |
Shield |
Eastmarch Overland |
|
|
BACK BAR |
Infused |
Crusher |
Ice Staff |
Eastmarch Overland |
Tremorscale reduces the Armor of all enemies in a small area depending on how high your Physical or Spell Resistance is. Because this set lasts for 15 seconds and has a cooldown of 10 seconds, you’re able to easily achieve 100% uptime.
If you want better self-sustain, Engine Guardian is the best method for a Tank to do so, despite restoring a random resource. This is because it restores resources instead of increasing your recovery stat. Restored resources bypass the Stamina Recovery lock that occurs when you block or sprint, allowing you to gain Stamina while doing either.
Drake’s Rush grants Major Heroism to you and 3 other group members when you bash an enemy, generating 3 Ultimate every 1.5 seconds. This allows everyone in the group to build Ultimate incredibly quickly. Because it generates the Ultimate over time rather than all at once, it gives you much more control over your Ultimate usage than Arkasis’s Genius and benefits from the Decisive weapon trait.
Akaviri Dragonguard reduces the cost of your Ultimate abilities by 15%, allowing you to use them much more often.
An alternative to Akaviri Dragonguard is Powerful Assault, though it can get expensive. It increases the group’s Weapon and Spell Damage by 307, improving overall group damage and healing. Powerful Assault requires you to cast an ability from the Assault skill line to trigger it. Tanks commonly use Echoing Vigor because it’s a strong HOT with a large radius and low cost.
Slotting Akaviri Dragonguard or Powerful Assault on both ability bars allows you to be more flexible with which Ultimate you use or which ability bar you choose to slot an Assault ability. If you equip it on the back bar only, you can also equip (Perfected) Void Bash on the front bar during add fights to easily group up enemies.
BEGINNER SETUP
Your options for beginner gear are typically limited to crafted sets or something cheap in guild stores. The Beginner Setup for the Sorcerer Tank build includes only Crafted Sets and is optimized for freshly created characters and CP160 Tanks looking for an excellent build to start farming more challenging content.
| SET NAME | TRAIT | ENCHANTMENT | WEIGHT/TYPE | ACQUIRED | |
|---|---|---|---|---|---|
|
HEAD |
Sturdy |
Maximum Stamina |
Medium |
Crafted |
|
|
SHOULDERS |
Sturdy |
Maximum Stamina |
Light |
Crafted |
|
|
CHEST |
Reinforced |
Maximum Health |
Heavy |
Crafted |
|
|
HANDS |
Sturdy |
Maximum Stamina |
Heavy |
Crafted |
|
|
WAIST |
Sturdy |
Maximum Stamina |
Heavy |
Crafted |
|
|
LEGS |
Reinforced |
Maximum Health |
Heavy |
Crafted |
|
|
FEET |
Sturdy |
Maximum Stamina |
Heavy |
Crafted |
|
|
NECKLACE |
Robust |
Potion Speed |
Jewelry |
Crafted |
|
|
RING |
Robust |
Magicka Recovery |
Jewelry |
Crafted |
|
|
RING |
Robust |
Magicka Recovery |
Jewelry |
Crafted |
|
|
FRONT BAR (MAIN HAND) |
Infused |
Absorb Stamina |
One-handed |
Crafted |
|
|
FRONT BAR (OFF-HAND) |
Sturdy |
Maximum Magicka |
Shield |
Crafted |
|
|
BACK BAR |
Infused |
Crusher |
Lightning Staff |
Crafted |
Druid’s Braid is equipped until you can obtain a suitable monster set to replace it. Some great beginner options are Tremorscale to reduce enemy Physical and Spell Resistance in an area, Sentinel of Rkugamz to increase group sustain, and Swarm Mother to help pull and taunt ranged enemies.
Torug’s Pact improves the enchantments on your weapons, increasing Stamina sustain and further decreasing enemy Physical and Spell Resistance.
Armor of the Seducer significantly improves your Magicka sustainability by increasing Magicka Recovery and reducing the cost of your Magicka abilities.
While this configuration is not required, it will provide the most optimal progression path for a beginner Tank. After obtaining a crafted gear setup, you may begin farming the other setups.
SKILLS


FRONT BAR
Pierce Armor (Morph of Puncture | Skill Line: One Hand and Shield)
• This is your primary taunt ability. It applies Minor Breach and Major Breach to enemies, reducing their Physical and Spell Resistance by 8,922.
Dark Deal (Morph of Dark Exchange | Skill Line: Dark Magic)
• Provides a burst of Health and Stamina immediately upon casting and continues to restore Stamina over 10 seconds. Additionally, casting Dark Deal grants Minor Prophecy to the entire group due to the Exploitation passive from the Dark Magic skill line. Be careful when using this skill, as it has a 1-second cast time and causes you to stop blocking during that time.
Vibrant Shroud (Morph of Encase | Skill Line: Dark Magic)
• Enemies in front of you are immobilized and have Major Maim applied to them, reducing their damage done by 10%. You and your allies in front of you are healed and are granted Minor Vitality, increasing your healing received and damage shield strength by 6%.
Hardened Ward (Morph of Conjured Ward | Skill Line: Daedric Summoning)
• Provides a strong damage shield and heals you for 15% of your Maximum Health while no pets are slotted.
Heroic Slash (Morph of Low Slash | Skill Line: One Hand and Shield)
• Provides Minor Heroism, granting you 1 Ultimate every 1.5 seconds and applies the Minor Maim debuff, reducing their damage done by 5%. Keep this skill active on the most threatening enemies at all times to help build Ultimate.
Ultimate: Replenishing Barrier (Morph of Barrier | Skill Line: Support)
• This is your secondary Ultimate ability, primarily slotted to benefit from the Magicka Aid passive from the Support skill line. It grants damage shields to nearby allies that restore your Ultimate and Magicka each time one dissolves to help rebuild Ultimate quickly.
BACK BAR
Silver Leash (Morph of Silver Bolts | Skill Line: Fighters Guild)
• Pulls in and taunts enemies. Unlock the Intimidating Presence passive from the Fighters Guild skill line to reduce the cost of Silver Leash by 15%.
Elemental Blockade (Morph of Wall of Elements | Skill Line: Destruction Staff)
• Triggers the enchantment on your Destructive Staff, even while on the front bar. While using an Ice Staff, you also provide damage shields to your group.
Inner Rage (Morph of Inner Fire | Skill Line: Undaunted)
• This is your secondary taunt. It allows you to taunt enemies from a distance and provides a synergy to up to 3 allies that deals Flame Damage. Inner Rage now deals Flame Damage when used instead of Magic Damage, meaning it can be used to activate the Encratis’s Behemoth set.
Boundless Storm (Morph of Lightning Form | Skill Line: Storm Calling)
• Your source of Major Resolve, increasing your Physical and Spell Resistance by 5,948. It also grants Major Expedition for 4 seconds, increasing your Movement Speed by 30%, allowing you to be much more mobile during fights when needed.
Bound Aegis (Morph of Bound Armor | Skill Line: Daedric Summoning)
• Passively increases your Maximum Magicka by 8% and grants you Minor Protection and Minor Resolve while slotted on either ability bar, reducing your damage taken by 5% and increasing your Physical and Spell Resistance by 2,974. Casting this ability increases your block mitigation by 40% for 5 seconds, allowing you to take harder hits.
Ultimate: Charged Atronach (Morph of Storm Atronach | Skill Line: Daedric Summoning)
• This is your primary Ultimate. It stuns enemies on impact and applies the Concussion Status Effect to them. It also provides a synergy that an ally can activate to grant Major Berserk to all nearby allies for 10 seconds, increasing their damage done by 10%.
ALTERNATIVE SKILLS
SPELL WALL

Skill Line: One Hand and Shield
Base Skill: Shield Wall
Spell Well can replace Replenishing Barrier if you can’t yet access that skill. Spell Wall allows you to regain Stamina quickly by heavy attacking while it blocks incoming damage for you.
AGGRESSIVE HORN

Skill Line: Assault
Base Skill: War Horn
Aggressive Horn can replace Charged Atronach if your group needs a higher uptime of Major Force, increasing the group’s Critical Damage by 20%.
BALANCE

Skill Line: Mages Guild
Base Skill: Equilibrium
Balance can replace Boundless Storm if you need more Magicka sustain; however, it significantly reduces your healing done and damage shield effectiveness.
CRYSTAL WEAPON

Skill Line: Daedric Summoning
Base Skill: Crystal Shard
Crystal Weapon can replace Vibrant Shroud or Heroic Slash to reduce enemy Physical and Spell Resistance by 1,000. Using this skill may cause you to have a more difficult time sustaining your Stamina.
REGENERATIVE WARD

Skill Line: Daedric Summoning
Base Skill: Conjured Ward
Regenerative Ward can replace Hardened Ward for a cheaper, though, weaker damage shield that can be used with Sorcerer pets. It also grants you and your allies Minor Intellect and Endurance for 10 seconds, increasing your Magicka and Stamina Recovery by 15%.
UNSTABLE CLANNFEAR

Skill Line: Daedric Summoning
Base Skill: Unstable Familiar
Unstable Clannfear can replace Vibrant Shroud on the front bar and Bound Aegis on the back bar if you want to stick with the pet build. If you do this, slot Bound Aegis on the front bar in place of Heroic Slash. This skill must be slotted on both bars to remain active.
ECHOING VIGOR

Skill Line: Assault
Base Skill: Vigor
Echoing Vigor can replace Vibrant Shroud or Silver Leash to provide more healing to your group. It’s most commonly used to activate the Powerful Assault set.
RAZOR CALTROPS

Skill Line: Assault
Base Skill: Caltrops
Razor Caltrops can replace Vibrant Shroud or Bound Aegis during add fights to apply Major Breach to all enemies in a large area, reducing Physical and Spell Resistance by 5,948.
OVERFLOWING ALTAR

Skill Line: Undaunted
Base Skill: Blood Altar
Overflowing Altar can replace Vibrant Shroud or Silver Leash to apply Minor Lifesteal to enemies and provide a synergy to allies that provides massive healing.
POWER SLAM

Skill Line: One Hand and Shield
Base Skill: Power Bash
Power Slam can replace Vibrant Shroud or Heroic Slash during add fights if you use the (Perfected) Void Bash set to pull in most enemies around you.
DESTRUCTIVE CLENCH

Skill Line: Destruction Staff
Base Skill: Destructive Touch
Destructive Clench can replace Inner Rage to taunt enemies and apply Minor Brittle and Major Maim to them, increasing their Critical Damage taken and reducing their damage done by 10%.
SCALDING RUNE

Skill Line: Mages Guild
Base Skill: Fire Rune
Scalding Rune can replace Silver Leash to help maintain your uptime of the Encratis’s Behemoth set more easily.
EFFICIENT PURGE

Skill Line: Support
Base Skill: Purge
Efficient Purge can replace Vibrant Shroud or Silver Leash to remove DOTs and other negative effects from you and your allies.
REVEALING FLARE

Skill Line: Support
Base Skill: N/A
Revealing Flare can replace Vibrant Shroud to gain Major Protection while on the front bar, reducing your damage taken by 10%. It also increases your Magicka Recovery by 10% due to the Magicka Aid passive.
CRUSHING SHOCK

Skill Line: Destruction Staff
Base Skill: Force Shock
Crushing Shock can replace Silver Leash when you require a ranged interrupt.
PASSIVES
Most passives in the skill lines you utilize are worth investing in; however, some are more critical to the build than others. One important thing to note is the absence of the Tri Focus passive. The Tri Focus passive is not recommended on a Tank, as it significantly harms your Magicka sustain by causing your block ability to cost Magicka while wielding an Ice Staff.
Below is a complete list of only the most essential passives to the Sorcerer Tank build, which should be unlocked first if possible.
DARK MAGIC
- Unholy Knowledge
- Persistence
- Exploitation
DAEDRIC SUMMONING
- All Passives
STORM CALLING
- Capacitor
- Expert Mage
ONE HAND AND SHIELD
- All Passives
DESTRUCTION STAFF
- Elemental Force
- Ancient Knowledge
LIGHT ARMOR
- Grace
- Evocation
- Spell Warding
- Prodigy
MEDIUM ARMOR
- Dexterity
- Wind Walker
- Agility
- Athletics
HEAVY ARMOR
- All Passives
SUPPORT
- Magicka Aid
RACIAL
- All Passives
FIGHTERS GUILD
- Intimidating Presence
UNDAUNTED
- Undaunted Command
- Undaunted Mettle
ALCHEMY
- Medicinal Use
MUNDUS STONE
THE ATRONACH
SHADOWFEN
RIVENSPIRE
GREENSHADE
The Sorcerer Tank build uses The Atronach Mundus Stone to increase Magicka Recovery by 310.
Each piece of Legendary Quality Divines armor increases this value by 9.1%. While wearing 5 pieces of Legendary Quality Divines armor, The Atronach Mundus Stone increases your Magicka Recovery by 451 and wearing 8 pieces increases your Magicka Recovery by 535.
Magicka Recovery is incredibly important on a Tank, as it is the primary resource you will use to maintain your buffs and heal yourself.
CONSUMABLES
FOOD
BEWITCHED SUGAR SKULLS
The Bewitched Sugar Skulls food is the best option to significantly improve your resource pools. It is relatively cheap to craft outside of the cost of Columbine, and the ingredients are easy to find. It can also be purchased from guild stores if you haven’t learned the recipe.
Bonuses:
• Increase Maximum Health by ~4620.
• Increase Maximum Stamina by ~4250.
• Increase Maximum Magicka by ~4250.
• Increase Health Recovery by ~462.
• Scales with your level.
• Lasts 2 hours.
Ingredients:
• Bervez Juice (2)
• Flour (5)
• Honey (5)
• Scrib Jelly (2)
• Columbine (2)
CAPON TOMATO-BEET CASSEROLE
The Capon Tomato-Beet Casserole food is similar to Bewitched Sugar Skulls. It doesn’t increase your resource pools as much or scale with your level; however, it is cheaper to craft. It can also be purchased from guild stores if you haven’t learned the recipe.
Bonuses:
• Increase Maximum Health by 4462.
• Increase Maximum Stamina by 4105.
• Increase Maximum Magicka by 4105.
• Lasts 2 hours.
Ingredients:
• Beets (1)
• Frost Mirriam (1)
• Poultry (1)
• Tomato (1)
WITCHMOTHER'S POTENT BREW
The Witchmother’s Potent Brew food is an excellent option for beginner Tanks struggling with Magicka sustain. Using this food sacrifices some Maximum Health and Magicka to increase your Magicka Recovery. It is cheap to craft, and the ingredients are easy to find. It can also be purchased from guild stores if you haven’t learned the recipe.
Bonuses:
• Increase Maximum Health by ~3094.
• Increase Maximum Magicka by ~2856.
• Increase Magicka Recovery by ~315.
• Scales with your level.
• Lasts 2 hours.
Ingredients:
• Bervez Juice (1)
• Nightshade (1)
• Rice (1)
• Small Game (1)
POTIONS
HEROISM POTIONS
Heroism Potions grants Minor Heroism when you’re not using Heroic Slash. Unfortunately, each ingredient in this potion is relatively expensive.
Bonuses:
• Restore ~7582 Magicka.
• Restore ~7582 Stamina.
• Gain Major Intellect.
• Gain Major Endurance.
• Gain Minor Heroism.
• ~47.6-second duration.
Ingredients:
• Columbine (1)
• Dragon’s Blood (1)
• Dragon Rheum (1)
TRI-STAT POTIONS
Tri-Stat Potions can be costly to craft but are your best option if you want to maximize your Health, Magicka, and Stamina sustain. These potions are the same as the Crown Tri-Restoration Potions given for free from the Daily Login Rewards Calendar.
Bonuses:
• Restore ~10377 Health.
• Restore ~7582 Stamina.
• Restore ~7582 Magicka.
• Gain Major Fortitude.
• Gain Major Endurance.
• Gain Major Intellect.
Ingredients:
• Bugloss (1)
• Columbine (1)
• Dragonthorn (1)
ESSENCE OF STAMINA
The Essence of Stamina potion should only be used to sustain your Stamina if you cannot afford to craft your Tri-Stat potions.
Bonuses:
• Restore ~7582 Stamina.
• Gain Major Endurance.
• ~47.6-second duration.
These potions are generic world-dropped potions and are not worth crafting.
CHAMPION POINTS
The Champion Point (CP) system in ESO provides many powerful benefits that allow you to customize and strengthen your build. It is unlocked at Level 50 and maxes out at 3600 points. The CP system has three unique constellations: Craft, Warfare, and Fitness. The Warfare and Fitness constellations each have three subtrees.
• The Craft constellation focuses on crafting, gold gain, movement speed, stealth, and increasing material yields.
• The Warfare constellation focuses on increasing damage, healing, and damage mitigation.
• The Fitness constellation focuses on your core stats, such as Maximum Health and various methods of recovery, and provides many defensive benefits.
The Champion Point allocation below is optimized for the Sorcerer Tank build, focusing on increasing damage shield strength, self-sustain, damage mitigation, and Movement Speed.
Follow the recommended path below while levelling up and spending your Champion Points to see strong progression.
- Steed’s Blessing (+50) (Slot 1)
- Gilded Fingers (+10)
- Fortune’s Favor (+10)
- Wanderer (+15)
- Steadfast Enchantment (+10)
- Rationer (+10) (Slot 2)
- Liquid Efficiency (+75) (Slot 3)
- Rationer (+20)
- Treasure Hunter (+50) (Slot 4)
- Master Gatherer (+15)
- Gifted Rider (+100) (Replace Slot 4)
- Gilded Fingers (+40)
- Breakfall (+50)
- Steadfast Enchantment (+40)
- Soul Reservoir (+33)
- Beyond this point, you can continue to unlock passives or more slottable perks based on your preference.
- Eldritch Insight (+10)
- Quick Recovery (+10)
- Preparation (+20)
- Ironclad (+50) (Slot 1)
- Duelist’s Rebuff (+50) (Slot 2)
- Blessed (+10)
- Focused Mending (+50) (Slot 3)
- Unassailable (+50) (Slot 4)
- Bulwark (+50) (Replace Slot 4)
- Elemental Aegis (+20)
- Hardy (+20)
- Piercing (+10)
- Flawless Ritual (+40)
- Battle Mastery (+40)
- Tireless Discipline (+20)
- Eldritch Insight (+10)
- Blessed (+10)
- Quick Recovery (+10)
- Beyond this point, you can continue to unlock passives or more slottable perks based on your preference:
- Unassailable (+25) can replace Bulwark or Focused Mending to reduce your damage taken from enemy AOEs.
- Enduring Resolve (50) can replace Bulwark or Focused Mending to reduce your damage taken from enemy DOTs.
- Rejuvenation (+50) (Slot 1)
- Tumbling (+15)
- Expert Evasion (+50) (Slot 2)
- Tireless Guardian (+10)
- Hasty (+8)
- Celerity (+50) (Slot 3)
- Mystic Tenacity (+10)
- Hero’s Vigor (+10)
- Shield Master (+50) (Slot 4)
- Hero’s Vigor (+10)
- Nimble Protector (+6)
- Fortification (+30)
- Defiance (+20)
- Tumbling (+15)
- Hasty (+8)
- Beyond this point, you can continue to unlock passives or more slottable perks based on your preference.
- Bracing Anchor (50) can replace Celerity to significantly increase your block mitigation in exchange for Movement Speed.
- Bastion (+50) can replace Celerity or Shield Master to increase the strength of your damage shields.
TIPS & TRICKS
The Sorcerer Tank build does not follow a traditional rotation. Instead, you must be able to adapt to meet the needs of whatever situation you find yourself in.
Below, you will find tips on effectively fulfilling the Tank role during enemy and boss encounters. Every Dungeon, Trial, and Arena has different mechanics, and it is essential that you understand your build and why you use the recommended armor sets and skills you do. Be sure to read this build guide entirely.
BUFFING AND DEBUFFING
Pre-buffing is an essential habit to pick up as early as possible to increase your efficiency as a Tank, allowing you to use your time once in combat more effectively. Always activate Dark Deal and Boundless Armor before starting combat to ensure your group has time to apply their pre-buffs.
Using as many buffs before combat as possible will allow you to focus primarily on taunting and grouping enemies. As the Tank, you should always initiate combat to have as much control as possible.
Elemental Blockade allows you to easily maintain a Crusher enchantment on your Destruction Staff back bar, even while on your front bar.
Heroic Slash should be kept active on threatening enemies if slotted to reduce incoming damage and increase your Ultimate regeneration.
If you follow along with the armor setups above, much of your build already focuses on buffing your group members. Fulfilling the Tank role in ESO means much more than having high Health and blocking.
Sets like Encratis’s Behemoth and Turning Tide significantly increase group damage, while other sets such as Nazaray, Saxhleel Champion, Pearlescent Ward, and Pillager’s Profit are excellent utility sets that improve group damage, defences, Ultimate regeneration, and complement your other equipped sets.
It’s best to avoid Fortified Brass, Plague Doctor, and Battalion Defender as you progress, as they offer nothing substantial to your group.
CONTROL
Learning which enemies should be taunted first and where to properly group enemies for your Healers and DPS is essential to becoming a great Tank. Grouping enemies in one area allows your group to place AOE abilities on you, then switch their focus to the more threatening enemies. The most threatening enemies are typically the largest or fewest in an add fight.
As a Sorcerer Tank, you have many abilities in your toolkit that taunt, pull, or both:
Pierce Armor is your primary taunt ability. Utilizing this skill will reduce enemy Physical and Spell Resistance the most.
Silver Leash pulls enemies to you and taunts them if another player hasn’t already taunted them.
Inner Rage is your secondary taunt that provides a synergy to 3 group members that deals Flame Damage to surrounding enemies when activated.
Destructive Clench is another ranged taunt that is an excellent alternative to Inner Rage. It applies Major Maim and Minor Brittle and immobilizes them.
Void Bash doesn’t taunt enemies, but it is an excellent way to pull most enemies in an area to you and apply Major Maim to them.
While you are not required to taunt every enemy, keeping them locked down to an area with snares and crowd-control abilities, such as Razor Caltrops, allows your group to take them down much faster.
POSITIONING
Positioning is possibly the most important skill to master when improving yourself as a Tank. Getting in the habit of placing yourself on the opposite side of your group is vital as it prevents them from taking potentially fatal cleave damage.
Before initiating combat, choose a location where you can easily group enemies. The best place is often the most enemy-dense area because it prevents you from needing to pull in more enemies than necessary.
Once you determine the best position to group enemies, cast Razor Caltrops to immediately reduce their Movement Speed, get in position, and follow up with Power Slam if you’re using the Void Bash set and then Vibrant Shroud to immobilize them if slotted. If you’re not using the Void Bash set, you can follow up with Restraining Prison right away. Enemies locked to an area are much easier to control and debuff.
Some enemies may be more spread out in some add fights, so you may need to pull them in with a more direct, longer-ranged ability, such as Silver Leash.
ULTIMATES
The buffs granted by most Ultimate abilities do not stack, so it’s a good idea to coordinate with your group on when you should use yours. The most commonly used Ultimate abilities by support roles are Aggressive Horn and Replenishing Barrier:
Aggressive Horn increases the group’s Maximum Magicka and Maximum Stamina by 10% for 30 seconds and grants them the Major Force buff for 10 seconds, increasing Critical Damage by 10%. Many groups will have their support roles rotate through their Aggressive Horns as the Magicka and Stamina buffs near the end of their duration to maximize uptimes; however, depending on the group composition of class, skills, sets, etc., and if Ultimate can be built up fast enough, some groups may rotate as the Major Force buff runs out to push DPS.
Replenishing Barrier is a powerful defensive Ultimate ability that grants massive damage shields to all nearby allies. It’s good to have in fights with phases of high-damage enemy attacks and mechanics, as it significantly increases the group’s survivability. Additionally, it restores your Magicka, generates Ultimate as the wards dissolve, and if you invest in the Magicka Aid passive from the Support skill line, increases your Magicka Recovery by up to 10% while slotted. If you’d prefer more group healing, Reviving Barrier heals your allies while they have the damage shield active on them.
As a Sorcerer Tank, you have other Ultimate abilities that your group may be more interested in:
Charged Atronach is the primary offensive Ultimate ability used by the Sorcerer Tank Build. It provides a synergy that an ally can activate to grant all nearby allies Major Berserk, increasing their damage done by 10%. Additionally, it stuns enemies on impact and continuously applies the Concussion Status Effect to them.
Spell Wall blocks enemy attacks for you, allowing you to quickly regain Stamina through heavy attacks.
NOVEMBER 15 / 2023: – UPDATE 40 – INFINITE ARCHIVE
• Trial Setups:
• Main Tank Setup:
• Replaced Turning Tide on the body with Drake’s Rush.
• After extensive testing, Drake’s Rush has become a staple for all of my Tank Builds, as it drastically reduces the time between Charged Atronach casts. By equipping it on the body pieces, it allows for easy swapping to other sets, such as Claw of Yolnahkriin and Crimson Oath’s Rive.
• Replaced Saxhleel Champion with Turning Tide.
• Saxhleel Champion has been moved to the Off-Tank Setup to make room from Drake’s Rush.
• Off-Tank Setup:
• Replaced Pillager’s Profit with Saxhleel Champion.
• Pillager’s Profit is still a solid option if your group already has really good Major Force uptimes.
• Swapped the Maximum Magicka enchantment on the shield to a Maximum Stamina enchantment to help balance the difference in Maximum Stamina between the front and back bars.
AUGUST 20 / 2023: – UPDATE 39
• Updated Attribute Points.
• Updated Trial Setups:
• Replaced Claw of Yolnahkriin on the Main Tank Setup due to Minor Courage being easily granted by an Arcanist.
• Claw of Yolnahkriin is still a great option in groups without an Arcanist.
• Replaced Engine Guardian with Encratis’s Behemoth.
• Engine Guardian is still a great alternative for self-sustaining.
• Updated Dungeon Setup:
• Changed the name of the Dungeon Setup to Intermediate Setup to more accurately convey what the setup achieves.
• Expect a dedicated end-game Dungeon Build for all classes in the future.
• Replaced Swarm Mother with Tremorscale for better group damage.
• Updated Alternative Skills:
• Changed from the Reverberating Bash morph to the Power Slam morph of Power Bash.
MARCH 22 / 2023: – UPDATE 37 – SCRIBES OF FATE
• Replaced Turning Tide with Akaviri Dragonguard on the Dungeon Setup.
• Added alternative options to the Warfare CP path.
• Added alternative options to the Fitness CP path.
JANUARY 26 / 2023:
• Added Passives to the build.
JANUARY 04 / 2023:
• Replaced Inner Rage on the back bar with Destructive Clench.
• Moved Inner Rage to the Alternative Skills section.